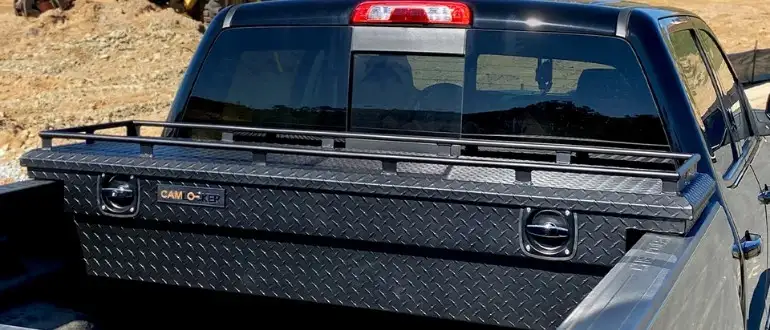
I don’t remember when I last saw my Silverado without a toolbox. Seems like the chest-like box is there forever. I also forget whether I drilled a hole to install that.
Well, the last part I won’t be able to recall because I didn’t drill any hole in my truck to set up the toolbox. Many of you must wonder how to install a truck tool box without drilling a hole.
You can install a truck tool box without drilling if your truck comes with pre-drilled holes. Set the tool box in place aligning the holes on both toolbox and truck. Now secure the box tightening the nuts and bolts or J-hook. Make sure not to overtighten otherwise you will damage the truck body.
I will share my experience and also expert opinion of veteran trukers to help you install the right tool box on your truck.
Types of Truck Tool Box
It is very important to choose the right toolbox for the truck. This is because the right toolbox helps to hold all the materials and equipment without wasting a lot of space on the truck.
- Crossover
- Chest-style
- Low-side
- High-side
- Flatbed
- Gull-wing
How To Install A Truck Tool Box Without Drilling?
I don’t want to move in a jiffy over all the complicated steps of installing a truck tool box. Thus, I have tried my level best to detail down each step so that you can have a securely placed tool box.
Step-1: Select A Suitable Location
You must select a suitable location before starting the installation process. Make sure the space you choose is slightly open, then it will be convenient for you to work.
Now put all the tools you use in the right position.
Necessary Tools to Install A Truck Tool Box
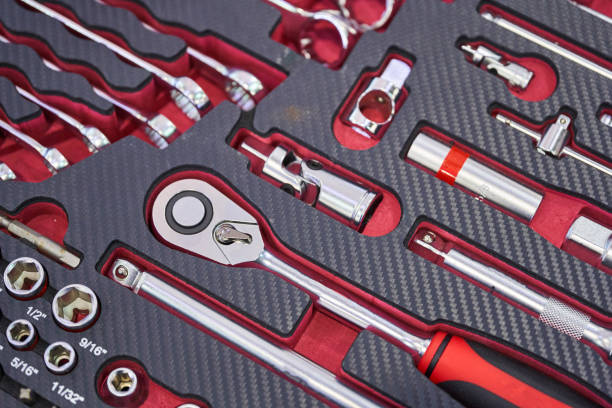
- Necessary screws.
- Open-ended wrench.
- Safety gloves.
- Padding material.
- Screwdriver or spanner.
- Measurement call.
- Heavy-duty bolts.
- Aluminum-block-type nuts.
- Aluminum J-hook.
Step-2: Collect Some Rubber Foam Padding
The tool box can damage the side and bottom of the truck when you install this on the truck.
For this, you need to use proper foam padding. Which plays a great role in protecting your truck from any accidents.
So before starting the installation work, you must make sure that you have collected some rubber foam padding.
Take accurate measurements of length and width depending on the box type with a remap tape. Then place the foam paddings on the truck’s bed liner.
But if your truck already has a bed liner, you can skip this step. This is because the coating can protect the truck from any damage by the box with the paint job.
Read More: What Size Toolbox For Dodge Ram 1500?
Step-3: Align The Box In The Correct Position
You will notice that there are several holes in the bottom surface of the truck’s cargo batty, and they are plugged in with several rubber plugs.
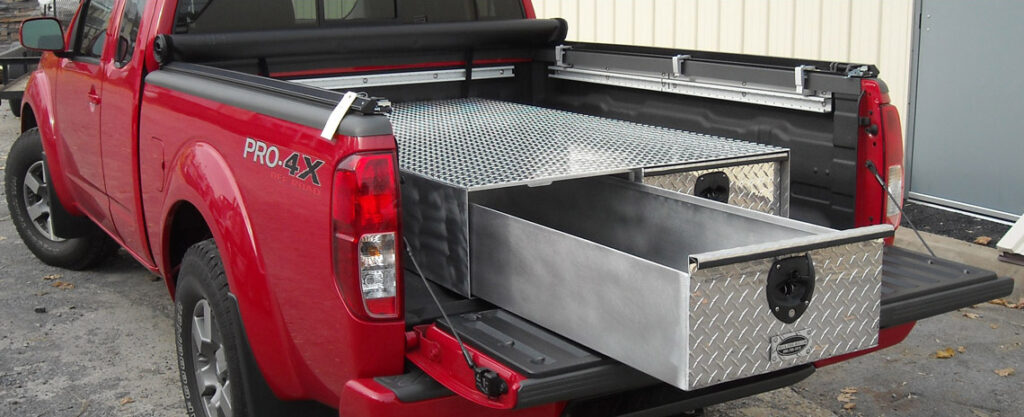
You need to take out those plugs and then align the box in the correct position. Then, loosen the cap to align the bottom holes with the holes found in the truck bed rails.
Step-4: Lock The Bolts
After aligning the toolbox and bed rail holes. Your bolts should be locked with screws in place. You may know that different trucks with tool boxes come with different designs.
So before placing the rail box, you need to perform this step. Typically, 4 to 6 bolts may be needed to repair a toolbox successfully.
Step-5: Tighten The Bolts
Now you can use pliers, wrenches, screwdrivers, or spanners to tighten the bolts. This helps to fit the toolbox with the bed rails of the truck.
But you must remember not to apply too much force to tighten the bolt. Because it can damage the bed rail.
Read More: What Size Toolbox For Toyota Tacoma
Step-6: Check Everything
Finally, re-confirm the task you just finished. You should check the re-installation and ensure everything is in the right place.
Now open the lid of the tool box and make sure that it opens without any hassle. Then ensure you have all the bolts, nuts, and washers fitted properly and in a tight position.
Steps To Install a Truck Tool Box With Drilling
The truckbeds of many vehicles, including some newer models, lack predrilled holes.
You’ll have to do some DIY hole-making before setting up your tool chest if that’s the case. This setup can be done in under an hour if you have the necessary power tools.
If you need to move something heavy, make sure to ask for assistance. It only takes a few simple actions to set up your toolbox:
- Measure the exact dimensions of the spot where you plan to keep your tool chest.
- Drill four to six holes using your power drill and a robust metal bit. Check that the tool box’s predrilled holes are a perfect fit for these.
- Align the holes in the truck bed and the holes in the tool box.
- Use either J-hooks or a set of nuts and bolts to fasten your toolbox. Never overtighten the screws; you want to ensure the box is securely fastened.
Also read: How To Open Truck Bed Cover Without Key? Answered!
Tips For Installing Truck Tool Box
Here we will give you some more tips to free you from the extra burden.
- Always make sure to use heavy-duty stainless steel for the J-Hook. And their resolution will be at least 5 to 16 inches wide and 5 inches long.
- Decide to use certain types of nuts and bolts that resemble an aluminum block that can hook up with a rail. It will not loosen or come back due to unequal vibration.
- You can use Loctite to protect against rough terrain and vibration. This will ensure that the joints are not too tight or too loose. Also, use a rubber-coated foam strip for padding. This will ensure durability.
- Always inspect the toolbox properly and keep it clean by removing dirt, mud, or debris.
How Do I Secure My Tool Box?
There are several ways you can keep your toolbox safe. We hope these steps help keep your toolbox safe:
- Find a place on the truck to secure the toolbox. The best place is usually through the handles on the side of the toolbox.
- Place the padlock through the hasp on the toolbox and the chosen place on the truck.
- Close the padlock to secure it.
- besides, you can use a padlock to secure the toolbox to the truck.
- Also, you can use a chain to secure the toolbox to the truck.
Read more about toolbox safety here.
What is the best way to measure your toolbox mount platform, drill, or Dremel?
The best way to measure your toolbox mount platform, drill, or Dremel is to use a tape measure.
Measure the length and width of the toolbox, and then add 1/2 inch to each measurement. This will give you the dimensions for the platform.
For the dimensions of the drill or Dremel, measure the length and width of the toolbox, and then add 1 inch to each measurement.
Read More: How To Install A Truck Tool Box With J Hooks
Final Thoughts
We hope that you have been able to learn how to install a truck toolbox without drilling by following this article. You can easily complete the task by following all the steps mentioned above. Hopefully, you find this article helpful.
