A flush mount tonneau cover may be the perfect option if you want a sleek and stylish way to cover your truck bed. These covers attach to the bed of your truck in a seamless fashion, giving your vehicle a polished look.
While some brands sell flush mount covers, you can make your cover using some materials.
So, how to make a flush mount tonneau cover?
Take some plastic sheet or plywood to use as a cover, some struts to lift the cover-up, and put angled iron aluminum for support, and you are done with your homemade flush mount tonneau cover. However, you will need to go through a step-by-step process and need some other materials.
Read on to know the step-by-step guide.
Why flush mount tonneau cover?
The interesting part about a flush mount tonneau cover is its use. As you install a tonneau cover for the cargo’s safety, there must be an easy loading and unloading process. A flush mount tonneau is the best way to load and unload easily.
The user fully opens up their tonneau cover and gets full access to their cargo bed. This is why there’s a slight difference in this cover system.
Types of the flush mount tonneau cover
There are mainly three types of flush mount tonneau covers you’ll find.
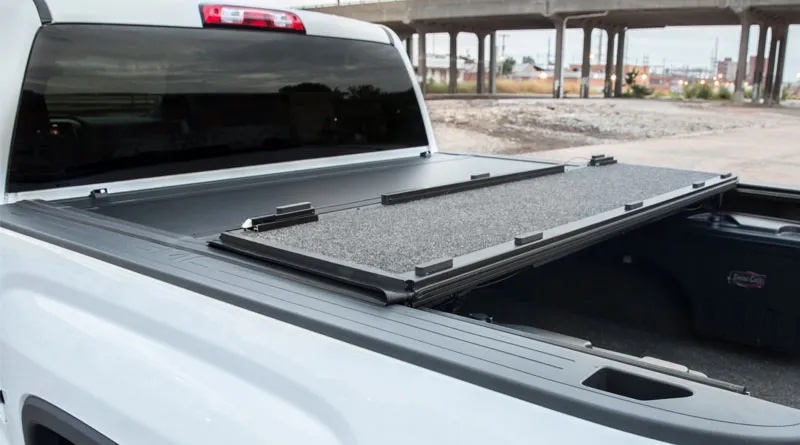
Flush Mount Folding Tonneau Cover
This one has a similarity with a tri-fold cover. Such folding Tonneau Cover has an additional fold to do one more fold back. Thus, it’s possible to keep the cover leaning back on the back window for a while until the loading or unloading is done. Of course, the user gets full access to his cargo bed through the system.
Roll-Up Tonneau Cover
Roll-up covers can be three kinds, hard, soft, or hybrid. The good thing is these covers are comparatively convenient for frequent uses on cargo beds. However, it requires an additional rail system for an easy roll-up.
Retractable Tonneau Cover (Hard Flush Mount)
What’s special about this cover is it retracts back and forth like a garage or shop shutter. It requires an additional rail-like roll-up tonneau cover. This kind is less preferable among the users because of the high price.
How to make a flush mount tonneau cover?
Now, let’s jump into the core discussion. But what is our pick? Of course, the roll-on tonneau cover. Because that will be the easiest, take the least time, and be budget-friendly. However, Other twos will be troublesome if you’re making a tonneau cover for the first time.
Let’s begin with what’s in our league.
Tools and materials needed
- Measuring tape
- Three pieces of 1-inch U-channel bars
- Table saw
- Clamps
- Hand drilling machine
- Flat aluminum bars (1-inch)
- Nuts and bolts
- Surface protector tape
- A big transparent plastic sheet
- Fiber cloth
- Marker
- Scale
- Scissor
- Double-sided adhesive tapes
- Sewing machine
- Two Velcro rolls
- Rivets
- A lock system for the tonneau cover
- Bolt ropes
Steps to make a flush mount tonneau cover at home
Following are the six steps to make a flush mount tonneau cover at home.
Step 1
Measure the length of the cargo bed’s side panel, followed by the bulkhead. Take three 1-inch U-channel bars and cut them. Two will equal two inches less than the side panels (the side rail will end two inches before the tailgate), and the other one is of the bulkhead.
Now, cut the two edges of the smaller U-channel bar placing it on the cutting machine by 45 degrees. Take the other two and cut each one’s edge the same way. Place them on the side panels and bulkhead and check if they are matched on the edges.
If so, keep them and fix the two side rails properly with clamps.
Step 2
The third rail on the bulkhead should be fixed with the two side rails by welding or flat bars. We’ll go for the second method.
Place a flat bar so that it is equally on the bulkhead’s end and a bed rail’s end. Take a hand drill and make two holes in it. Drill further through it so that the bed and bulkhead rail get one similar hole each. Do the same for the other end.
Take four bolts and nuts and fix the rails properly. Now, the three pieces are attached and set in the truck’s cargo bed panels.
Drilling works may cause scratches on the metal surface of your cargo bed’s panels. You can either place surface protector tape(s) between the rails and the panels or do the post-measurement tasks at some other place.
Well, that’s compulsory from this moment anyway because more drilling work is coming. So, assume that bed rails were detached from the truck earlier (after the edge cutting by 45 degrees) and placed on a large table in your garage. But be careful and avoid slight displacement.
Step 3
Now, take a big transparent plastic sheet and put it on the rails structure. Mark the four corners in it, then take it down. Draw a rectangle by connecting the four points with a marker pen. Make the length and width of the rectangle one and a half inches extended using scale and mark the lines. Cut the final rectangle. Make its edge round with a scissor.
Bring the fiber cloth that would be our tonneau cover. Place the cloth on the plastic and cut it to the sheet’s size. Next, place the cloth on the ground and make its edges stronger.
Take the same type of fiber cloth and cut four pieces according to the lengths, widths, and round edges. Attach them with the cloth with double-sided adhesive tapes. Flat stitch the edges and sew in the inbound parts. Sew two bolt ropes that will be used to bind the tonneau cover after folding up.
Step 4
Take the velcro rolls and cut four same-size pieces according to the bed rail’s length. Place the cover on the framework again and check if it crosses the bed rails on both sides and can clasp its adjacent side. If the cover is big enough, sew velcros on both sides from one end.
Then, fix two more velcros on the bed rails’ outer side where the cover reaches. Use double-sided adhesive tape. To keep the position of the velcro stable, drill at least four holes at the same distance on the bed rails through the velcro. Set rivets in the holes.
Step 5
Now, for a while, bring the structure on the panels of the cargo bed again. Place the cover on it and fix the cover with the rails by velcros. Close the tailgate. You’ll notice a portion of the cover at the tailgate’s end is free and vulnerable. You’ve got three extra inches of the cover.
Now, a lock is necessary. Get a lock setting for that part. Set it on the bed rail and do some sewing to complete that. You should take professional help in this task. After setting the lock, check if that works properly.
Read also: Bakflip Mx4 Problems
Step 6
It’s time for the final task. Take down the whole structure. Fold back the whole cover. Place its unused part on the bulkhead rail and make six or eight holes on the bulkhead rail through. Use nuts and bolts to fix them.
The flush mount tonneau cover is ready. Wasn’t that easy?
The process may seem lengthy for the first time. Read again for a better understanding.
Some thoughts
- Instead of using the U-channel bar, you can use other bars.
- The calculation is better understandable while working. Don’t try to follow exactly the process discussed here. Things may vary a little. Use your guts with the ideas we provided.
- There can be metal stick support in the tonneau cover set by sewing. Consider doing so if it seems convenient and useful.
- The lock system could increase the cost that you suppressed by self-making. So, try to find something at a lesser price but essential.
- There can be a little imbalance between the surfaces of the bulkhead rail and side rails, which may cause trouble. You may use extra five to ten layers of surface protector tape to manage the imbalance.
- Avoid moving the three rails while being attached. That may cause accidents or damage. Using aluminum glue, you may attach the two internal edges with two more aluminum bars. That will keep the junction sturdy. You can remove the glue easily at any time by rubbing alcohol.
FAQ
What makes flush mount tonneau covers different from others?
This cover can be folded 100%, and the user gets full access to the cargo bed. It’s one of the core advantages of the cover.
Is a homemade flush mount tonneau cover a good choice?
Yes. It’s a good choice as money is saved, and the user can make and modify it according to their preference. But, it may seem a bit troublesome for those making a tonneau cover for the first time.
Is installing and uninstalling flush mount tonneau cover easy?
Like most, the tonneau cover it’s very easy. However, you may need multiple people to uninstall it.
What problems may you face while making a flush mount homemade tonneau cover?
It’ll be tough to add a lock. Also, choosing the most convenient metal bar for making bed rails may require calculation and brainstorming.
Final Words
When making a flush mount tonneau cover for your trucks, it’s always important to recognize what serves your interest. Also, don’t take the chance of ruining your single second or wasting resources. You may also take help from experts to save your time and stress.
