Tonneau covers are one of the most sought-after equipment in the trucker market. Using aircraft-grade materials, they are known for their sturdy build.
Because of this, they are so tough that they’ll outlast your pickup truck.
You might want to paint your tonneau cover for aesthetics or maintenance purposes. But are you looking for “How to Paint a Tonneau Cover?”
You will first need to gather all the tools and equipment, like a wrench, ratchet, sandpaper, primer, and paint. Moving on, you will need to clean, detach and sand down the cover for painting. After sanding and cleaning, carefully apply the primer before moving on to the final painting.
Well, that’s not all. We have a step-by-step guide ready just for you. It will be effortless to paint your tonneau covers at home.
Let’s begin.

Step-by-Step Guide for Painting Tonneau Cover
Because tonneau covers are so large and flat, paint imperfections might appear. No matter how slight, it will not be visible after the cover has been repainted.
To that end, you should prioritize quality over quantity when painting. Tonneau cover painting can leave one feeling a bit befuddled. However, painting your tonneau cover is a great way to preserve its appearance.
If this is your first rodeo, you might be baffled by all the technicalities. Reviewing the finer points of painting a tonneau cover is always a good idea.
Whether it’s your first time buying a car, you just got a new cover, or you want to do it right. In just 8 simple actions, you’ll find out how to paint a tonneau cover.
Necessary Tools & Equipment
Before jumping into the paint job, you will need some tools and equipment. All of these are easy to find in the local parts store. Hence, you can DIY the whole project sitting in your parking lot.
Here is the list of necessary tools and equipment:
- Wrenches and Ratchets for detaching & attaching the tonneau cover
- Different grades of sandpaper ( 120, 320, 600 )
- Cleaning Compound
- Paint Primer
- Main Paint ( Match color code before buying)
Now, you can move on with the paintwork.
Step 1: Preparation
You might have bought a new set of tonneau covers, switched vehicles, or just got your first truck bed cover. Now that winter is over; you’re probably eager to get your truck back in the open air.
If nothing else, you should always have the manual on hand. There may be details here and there that have escaped your attention. Also, prepare the truck by doing a pressure wash before you run down the paint.
Step 2: Check For Model Specific Guide
You must check to see if any model-specific guidelines could apply to your vehicle.
If you want to fix this, check your truck’s manual to see if the painting is covered. If so, continue as instructed.
Step 3: Detaching the Tonneau Cover
You must take the cover off to paint it. Take off the truck’s tonneau cover with a ratchet and socket.
Lift the vehicle’s cover and set it on supports so you can get to all corners. While doing this, take help from another person. This is not a one-person job.
To get the best results when painting your cover, you should do so in a cool, shaded area. You could park your pickup truck in a tree. Or if you have a garage, you could leave it there.
Step 4: Preparing the Cleaning Solution
Don’t let the intimidating name deter you. The cleaning method is straightforward and needs no unusual supplies.
Add a half cup of car wash solution to a bucket of hot water, and stir to dissolve. You should be especially careful if your cover is made of vinyl or another soft material.
If this is the case, you should switch to a tonneau cover cleaning solution instead of regular car wash liquid.
Step 5: Cleaning the Tonneau Cover
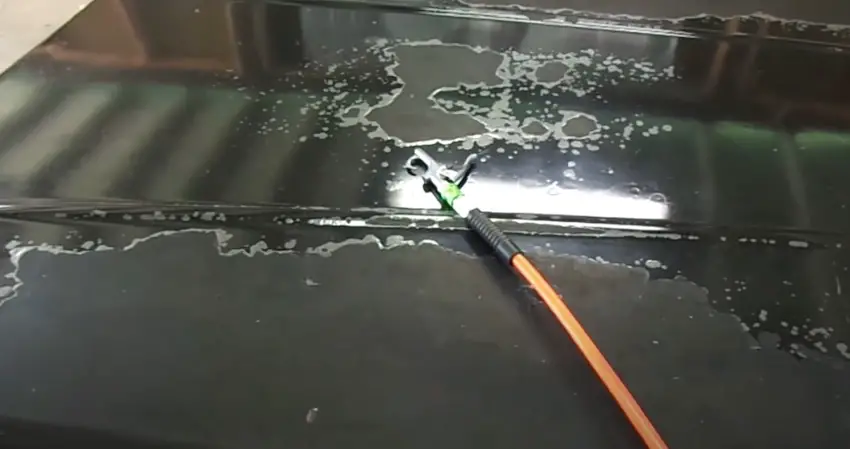
Thorough cleaning must be the first order of business. You will require extensive work to clean the tonneau cover. Wet the cover down with a spray bottle to start.
If you prefer, you can use a bucket, but be careful not to spill all of the water onto the cover at once. Take care; a light spray pattern is suggested.
Apply this solution all over the cover with a scrub brush. Spot-clean the cover by working from the center outward.
When cleaning, use a gentle hand and a side-to-side motion with the brush. Soak the brush for 5 minutes in water if the grime is stubborn.
You’ll want to make sure you have access to clean water. Also, ensure a dry place to hang up the cover to dry.
After scrubbing, rinse the cover in clean water to remove the soap, then set it aside to dry. Please wait until it is completely dry before proceeding.
So far, all you’ve done is give the cover a good scrub down in preparation for a fresh coat of paint.
Step 6: Sanding the Tonneau Cover
You can begin painting as soon as the cover is dry. The first step will require sandpaper of varying grit sizes and a water hose.
If you don’t use the water to keep dust and dirt from collecting on the surface and scratching the cover, deep scratches will show through the new paint.
Sand the tonneau cover with 320 grit sandpaper while holding a running water hose over the paper. Work your way up to 600-grit paper gradually.
You’ll need to sand the lid again to get rid of the scratches left behind by the 600-grit sandpaper.
This time with the finer 800-grit grit. It is essential to keep the 800-grit sandpaper damp while using it. After this is finished, you should let the cover air dry completely.
Step 7: Cleaning & Priming the Tonneau Cover
You should use a tack rag to remove dust and debris from the cover before painting. Consequently, any last traces of dust and dirt are gone. Tiny particles like these may be discernible under dry paint.
After ensuring the sanding has left no visible marks, the base must then be primed. After applying a thick layer of primer to the tonneau cover, let it dry for 30 minutes.
Step 8: Painting & Finishing the Tonneau Cover
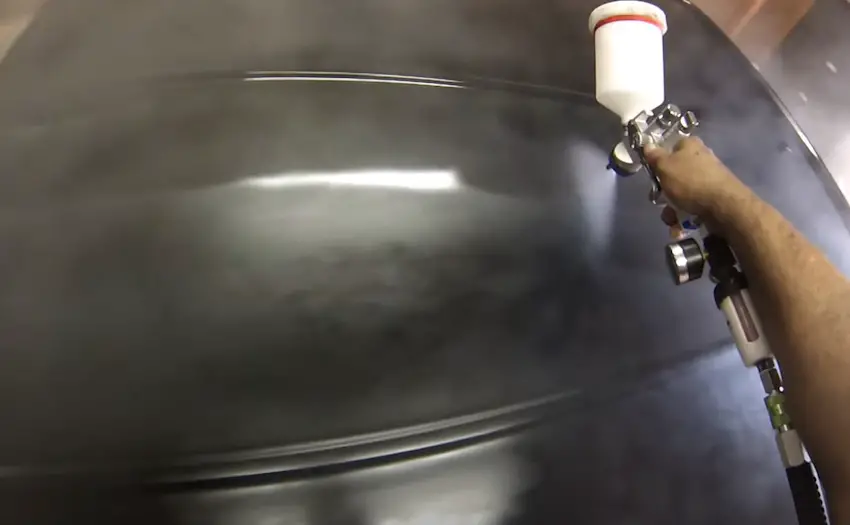
Once the primer has dried, brush on another three to five thin coats of paint. Spray the paint in thin coats from a distance of 6-8 inches to prevent runs.
The paint needs to dry for 30 minutes. Follow up with three to five layers of clear coat paint applied similarly.
Don’t touch the tonneau cover for at least four or five hours, so the paint has time to dry.
After drying, check for any paint defects.

Tips For Painting A Tonneau Cover
We have explained the painting process quickly in the previous sections. Here are some tips to make things even more accessible during the process.
- If your cover has been painted before, you should use a leaf blower to remove any peeling paint or clear coat.
- You can have it sanded in stages, from coarse (180 grit) to fine (320 grit) to extremely fine (600 grit).
- See your vehicle’s user manual if you need help finding the appropriate color. Plaques or stickers with the information printed on them are typically placed in the glove box, under the hood, on the trunk lid, or in the doors.
- If the cover is properly sanded, primer isn’t always necessary.
Hopefully, these tips will come in handy during the painting process of the tonneau cover.
FAQs
Can A Tonneau Cover Go Through The Car Wash?
A fiberglass or plastic tonneau, being hard, should be fine in a car wash. To avoid scratching the paint job on your tonneau, a touchless car wash might be the way to go. However, don’t put soft tonneau covers through the car wash process. It might get damaged.
Can I Repaint Tonneau Cover?
Whether you want to paint it to match the tonneau cover or go with a completely different hue is up to you. Before painting, you’ll need to sand down the existing coat. This will ensure a good coat of paint over the old one.
Do Tonneau Covers Save Gas?
Unless you have a tonneau cover, your truck bed will act like a bucket, collecting air as you drive. The engine has to work marginally harder due to this drag. Sealing the pickup truck bed with a tonneau cover improves aerodynamics and, in turn, gas mileage.
Conclusion
That will be all from our side on how to paint tonneau covers. They require routine upkeep in the form of cleaning and repair to last.
We hope these instructions were helpful as you set out to paint your tonneau cover.
Have a great day painting.
